
Comprehensive Guide to PTO Drive Shaft Universal Joint Maintenance
Understanding U-Joint Anatomy
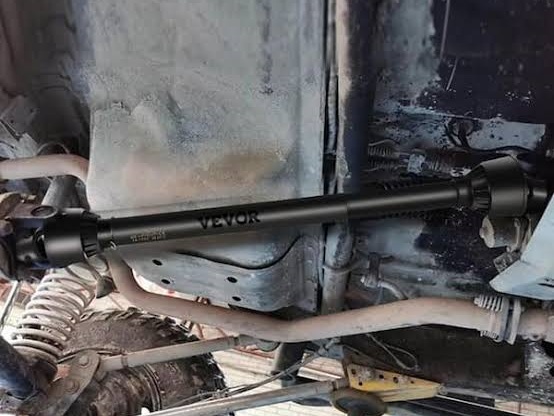
The universal joint, commonly referred to as the U-joint, is a fundamental component in the PTO (Power Take-Off) drive shaft system, facilitating torque transfer at various angles. To properly maintain a U-joint, it is essential to understand its anatomy, which comprises several key components: the cross, bearing cups, needle rollers, and seals. Each of these parts plays a crucial role in ensuring optimal performance and longevity of the drive shaft.
The cross is the central piece of the U-joint, serving as the pivot point around which the other parts revolve. It typically has four arms that connect to bearing cups on either end for smooth rotation and efficient force transfer. The cross is essential for allowing flexibility, enabling the drive shaft to articulate effectively while absorbing vibrations.
Each end of the cross is coupled with bearing cups, which house the needle rollers. These needle rollers function as bearings, reducing friction between the components and allowing for the efficient movement of the U-joint. The design promotes low wear, but regular inspection is vital to prevent any malfunction due to wear and tear over time.
Seals are another critical component of the U-joint. Positioned around bearing cups, they protect the needle rollers and keep lubricants contained within the joint. Proper sealing is essential to maintain lubrication and prevent debris from causing damage. A defective seal could lead to increased friction and wear, ultimately compromising the effectiveness of the U-joint.
Understanding these components and their functions is imperative for anyone looking to maintain a PTO drive shaft effectively. Regular checks and timely replacements of worn or damaged parts will significantly enhance the performance and longevity of the U-joint, ensuring optimal function in demanding applications.
Identifying Wear and Damage
Universal joints (U-joints) are crucial components in the drive shafts of various machinery and vehicles, providing flexibility and rotation between different components. Regular maintenance checks are essential for ensuring the longevity and efficiency of U-joints. Identifying signs of wear and damage early can prevent extensive repairs and ensure safe operation.
One common indicator of U-joint wear is radial play, which can be detected by grasping the driveshaft and attempting to move it up and down. Any noticeable movement is a clear sign of wear and may indicate that the U-joint needs servicing or replacement. This excess play can lead to imbalances, creating additional strain on the drivetrain and potentially causing further damage if not addressed promptly.
Another critical indicator is blue discoloration on the joint, a result of overheating. This discoloration suggests that the U-joint has been subjected to excessive heat, commonly caused by improper lubrication or excessive load. Overheating can lead to the degradation of the joint’s materials, which may compromise its structural integrity. Observing this color change should prompt immediate investigation and potential replacement of the affected joint.
Additionally, signs of seal damage are crucial when assessing U-joints. Inspecting the seals for cracks or deterioration will provide insights into the joint’s condition. Damaged seals can permit dirt and debris into the joint, which might further exacerbate wear. Regularly maintaining the lubrication of these joints can help prolong their lifespan and performance.
Neglecting these indicators of wear can lead to severe consequences, including complete U-joint failure. Such failures can cause loss of control and costly damage to the surrounding components. Therefore, it is vital to assess these signs carefully during maintenance checks to ensure operational reliability and safety.
Cross Kit Removal Procedure
The removal of a cross kit from a universal joint (U-joint) is a fundamental procedure in its maintenance, ensuring longevity and optimal performance. To effectively execute this task, specific tools and techniques should be employed.
Begin by gathering the necessary tools. Essential tools include a pair of snap ring pliers, a suitable socket set, a hammer, and a hydraulic press, if available. Additionally, having a clean work surface and safety gloves is advisable to ensure a safe working environment.
To start the removal, first address the circlips or retaining rings that hold the cross in place. Using the snap ring pliers, carefully extract the circlips from their positions. It is vital to handle these components with care to prevent damaging the U-joint or losing any parts. If the circlips are particularly stubborn, applying a small amount of penetrating oil may facilitate their removal.
After successfully extracting the circlips, you will need to remove the cross itself from the bearing cups. This is where the press-out technique comes into play. Position the U-joint between the anvil of the press and a suitably sized socket that fits the cross. Gradually apply pressure using the hydraulic press, ensuring to remove any obstructions and evenly distribute the force. This process should allow the cross and bearing cups to be extracted smoothly, without damaging any components.
Once the cross is removed, attention should turn to the bearing cup removal. Using a similar technique as before, place the bearing cups into the press and use an appropriately sized socket to apply pressure until the cups dislodge from the yoke. It is essential to ensure that the pressure is applied evenly to prevent any damage to the U-joint itself.
By following these steps carefully, technicians can effectively remove a cross kit from a universal joint, setting the stage for proper maintenance or replacement.
Reinstallation Procedures for U-Joint Components
Reinstalling U-joint components correctly is crucial for the optimal performance and longevity of the PTO drive shaft. The process begins with the preparation of the needle rollers. Before reinstalling the U-joint, it is vital to pack the needle rollers with high-quality grease. This step ensures they are properly lubricated, which is essential for efficient operation. Use a sufficient amount of grease to fill each roller, ensuring that there are no air pockets which may lead to premature wear or failure.
Following the lubrication of the needle rollers, aligning the cross phasing correctly is the next critical step. The cross phasing involves ensuring that both ends of the drive shaft are aligned in a parallel manner to avoid excessive vibrations and stress on the U-joint itself. To achieve this, the shaft should be rotated until the yokes are in the ideal position. It is beneficial to refer to the manufacturer's specifications during this process, as different applications may have unique alignment requirements.
Once the cross phasing is aligned, the next step is to verify the seating of the retaining rings. Retaining rings play a vital role in securing the needle bearings within the U-joint. When reinstalling these rings, it is essential to ensure that they sit completely in their respective grooves. A common mistake is insufficient seating, which may lead to the rings dislodging during operation. A visual inspection or gentle tugging can help confirm that the retaining rings are firmly in place. This thorough check is vital to prevent future issues, which could result from failure due to improper reinstallation.
Post-Replacement Checks and Protocols
Following the replacement of a Universal Joint (U-joint) in a PTO drive shaft, several crucial checks must be performed to ensure optimal functionality and longevity of the component. The first essential check involves assessing the rotational smoothness of the drive shaft. After installation, it is advisable to turn the shaft by hand to verify that it rotates freely without any binding or unusual resistance. Any roughness may indicate misalignment or debris remaining within the assembly, requiring further investigation.
Moreover, it is critical to confirm that the phase timing marks are accurately aligned. Incorrectly phased U-joints can lead to excessive vibrations and potential damage, which can greatly impact the overall performance of the PTO system. Ensure that the marks on the driveshaft and yokes correspond correctly, adhering strictly to manufacturer specifications. This step is vital as it enhances vehicle stability and safety during operation.
The next step involves applying grease, which plays a pivotal role in prolonging the lifespan of the U-joint. For optimal results, it is recommended to use NLGI #2 lithium EP grease, known for its excellent lubrication properties and temperature resilience. When applying grease, it is crucial to fill the joint until the grease emerges from the opposite side, indicating that the joint is adequately lubricated. Proper greasing protocols should be established, with intervals set according to usage—commonly, greasing every 50 to 100 hours of operation is suggested.
Adhering to these checks and protocols after a U-joint replacement will significantly support proper functioning and enhance the reliability of the PTO drive shaft system. Regular monitoring and maintenance practices like these ensure the longevity and integrity of your mechanical assemblies.
Consequences of Neglected U-Joint Maintenance
Failing to adequately maintain universal joints (U-joints) in a PTO drive shaft can lead to a range of serious and costly issues. One of the most immediate and concerning consequences is cross seizure, where the bearings freeze, preventing the U-joint from rotating properly. This phenomenon is often caused by a lack of lubrication, which can result from neglecting regular greasing schedules. Cross seizure can halt the functioning of machinery and require replacement of the U-joint.
Another critical consequence of insufficient U-joint maintenance is tube wear. When U-joints are not lubricated correctly, they can create excessive friction, leading to premature wear on the drive shaft tube. This not only compromises power transfer efficiency but can also necessitate costly repairs or replacement of the entire drive shaft. Ensuring that U-joints are maintained can help extend the lifespan of the drive shaft itself.
Increased vibration is another potential outcome of unmaintained U-joints. As U-joints begin to fail due to wear and tear, they can cause misalignments, leading to excessive vibrations during operation. These vibrations may not only result in a noisy operation but can also create additional stress on other components of the machinery, possibly resulting in further damage if left unaddressed.
Guard damage can occur as a secondary consequence of neglected U-joint maintenance. With increased vibration and misalignment, various components, including safety guards, may sustain unexpected wear or even complete failure. This not only poses safety risks but also increases downtime while repairs are performed.
Lastly, one of the most severe risks posed by insufficient U-joint maintenance is the potential for catastrophic shaft failure. A complete failure of the U-joint while machinery is operational can lead to dangerous situations, including injury to operators or bystanders and significant damage to equipment. To avoid such catastrophic events, it is crucial to prioritize routine U-joint maintenance and inspections, ensuring proper function and safety for all related machinery.
Field Maintenance Checklist and Spare Parts Inventory
Effective maintenance of PTO drive shafts and their universal joints (U-joints) is crucial to ensure optimal performance and longevity of agricultural and industrial equipment. A thorough field maintenance checklist helps in identifying potential issues before they escalate into costly repairs. Below is a recommended checklist that service technicians should follow during routine inspections of U-joints.
Field Maintenance Inspection Checklist:
- Inspect U-joint for signs of wear or damage, such as rust, corrosion, or cracks.
- Check for proper lubrication levels; ensure that the grease fittings are clean and functional.
- Examine the yoke for alignment; misalignment can accelerate wear on the U-joint.
- Verify that the U-joint spins freely without any binding or noise; excessive play should be addressed immediately.
- Assess the lubrication from the last service; ensure it meets manufacturer specifications and apply as needed.
- Check for leaks around the seals; replace any seals that show signs of wear or damage.
In conjunction with regular inspections, maintaining an adequate inventory of spare parts is essential for minimizing diagnostic and repair times. A thoughtfully curated parts inventory will enhance the overall efficiency of fleet operations, allowing technicians to address repairs swiftly.
Recommended Spare Parts Inventory:
- Replacement U-joints of various sizes to accommodate different PTO shafts.
- Grease fittings and compatible lubricants for regular maintenance.
- Yokes and related fasteners to facilitate quick replacements.
- Seals and gaskets to prevent contamination and ensure proper function.
Having these items readily available will significantly improve readiness for servicing PTO drive shafts and their U-joints. By adhering to this checklist and maintaining a comprehensive inventory of spare parts, technicians can enhance the reliability of their equipment and reduce downtime, ultimately leading to more effective and efficient fleet operations.
Quality
Expert driveshaft manufacturing with 20 years experience.
GET IN TOUCH
Tel:+86-571 88065675 | +86-571 88842852
E-mail:oceanindustry@vip.163.com
Fax:+86-571 88844378
Address:4th Floor, Block 2, Qianjiang Century Industrial Park, 2327 Hongning Road,Ningwei Town,Hangzhou, China
© 2005. All rights reserved.